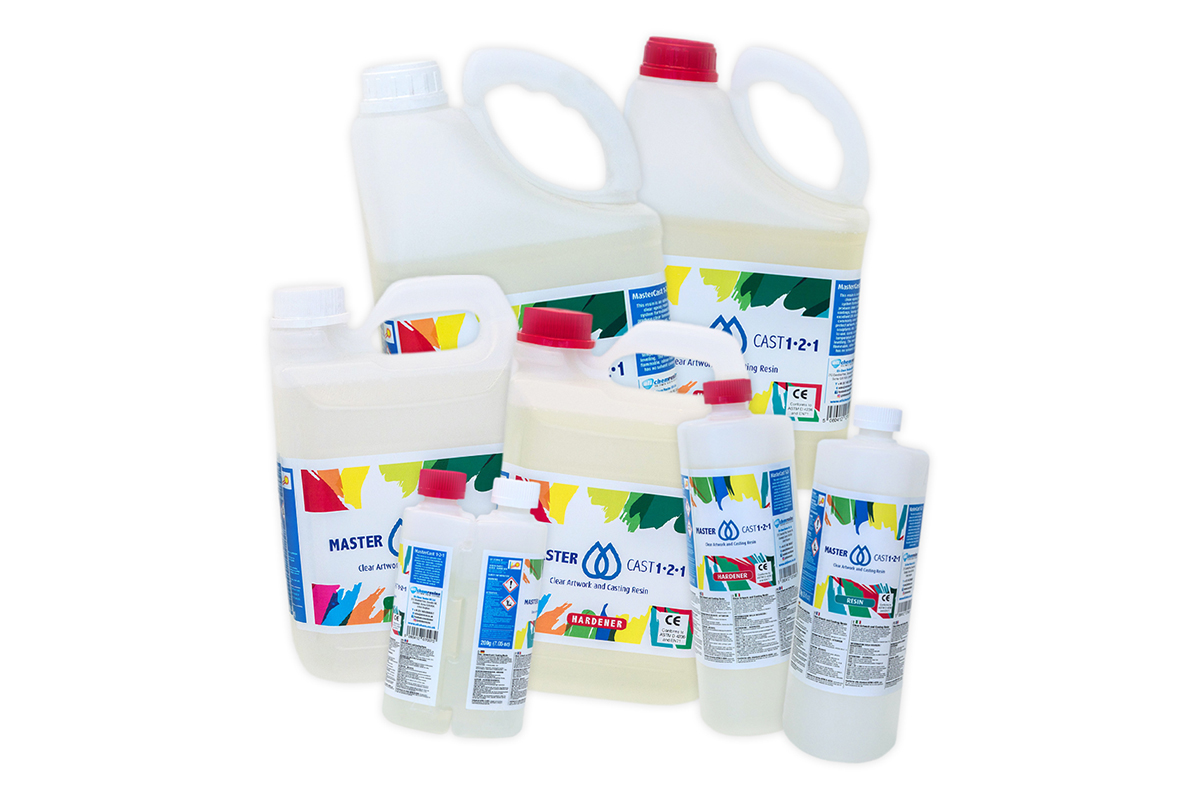
If you translate resin from English, it means synthetic resin or simply resin. Resin has an incomparable gloss and offers many possible applications. Resin is used, for example, in industry, automotive engineering or boat building. There is a wide range of different synthetic resins to choose from: Acrylic resin, polyester resin, polyurethane resin, epoxy resin and some more. In art, we use the highest quality of these synthetic resins, epoxy resin. Epoxy resin is a very high-quality plastic. It consists of so-called polymers; that is, it is a chemical substance composed of many molecules. Epoxy resin is created by a chemical reaction when resin and hardener are combined. This plastic is no longer deformable after it has hardened. It is therefore also called thermosetting plastic.
Although our resins are made with the highest quality and most modern materials, all epoxy resins are chemicals and should be handled with proactive safety hygiene and responsible care.
- Always wear nitrile gloves and avoid skin contact. The liquid resin and especially the hardener contain substances for which it is better if they do not come into direct contact with the skin.
- Direct skin contact, as with many other substances, can cause irritation of the skin or even allergic reactions.
- We recommend working with resin only in very well ventilated areas.
Our resins have an ASTM-D4236 certificate which states that no harmful fumes are emitted when used correctly. However, as we artists often work with paints and additives where we do not know the properties, we recommend a respirator with chemical filter. - Safety glasses especially when grinding the hardened resin.
- DO NOT eat, drink or smoke while working.
- Wear a respiratory mask when grinding hardened resin.
- Please do not work near children or pets and make sure that they do not come into contact with the materials
Please store your containers in a cool and dark place. This applies especially to the hardener component. Containers that are exposed to high temperatures will turn yellow much faster. You should also close the containers immediately after use. The oxidation process also leads to premature yellowing of the resin.
Our resins are best processed at 22-25 °C ambient temperature. Then they have their perfect viscosity, are neither too thick nor too thin. If it is colder, resin becomes more viscous, is more difficult to process and forms countless small bubbles. A remedy for this is a warm water bath: place the well-sealed bottle (or canister) in warm water or on the heater for ten minutes. Make sure that no water gets into the bottle - even a drop can cause your resin to become cloudy. It is also important to know that this heating changes the viscosity and shortens the processing time.
Please do not confuse food-safe with "can come into contact with food".
As a rule, the commercially available resins are not food-safe. For this you need complex and constant test procedures, which are very expensive. However, our resins are tested with an ASTM certificate that they can come into contact with food.
A work covered with resin cannot be used as a cutting surface. Food can be stored on it - it will not cut. Cuts would damage the surface and it would no longer be sealed. This also applies only to the clear, non-colored resin.
No, if you add more hardener, you will overload the system and it will result in insufficient curing. It remains sticky, so to speak. If you add too little, it leads to the same problem. The speed of cure is determined by the amount of accelerator we formulate in the product and not by the amount of hardener you add. Please always follow the recommended mixing ratio on the bottles.
Yes, you can save that. When about 70 percent of the surface is dry, simply add another layer of the same resin to the surface. Please pour over it rather generously here.
When resin and hardener mix, a chemical reaction takes place, the curing process already begins. This reaction - called exothermic - produces heat that is released. As long as your mixture becomes barely noticeably warmer, everything is fine. However, if you notice a stronger warming, it is an accelerated reaction - and it should not be. Read in the next point what you can look out for to prevent this.
You can prevent your mixture from getting very hot.
- Make sure that your measuring or mixing cup is not narrow, but has a large diameter. The heat that is generated due to the exothermic reaction can be released better over a larger surface.
- Mix larger quantities in separate vessels. For example, do not mix two litres once (in one vessel), but rather mix one litre twice (in two vessels).
- Do not leave your mixed resin in the mixing cup, but distribute the resin immediately into your paint cups or pour half of the resin into another cup, for example.
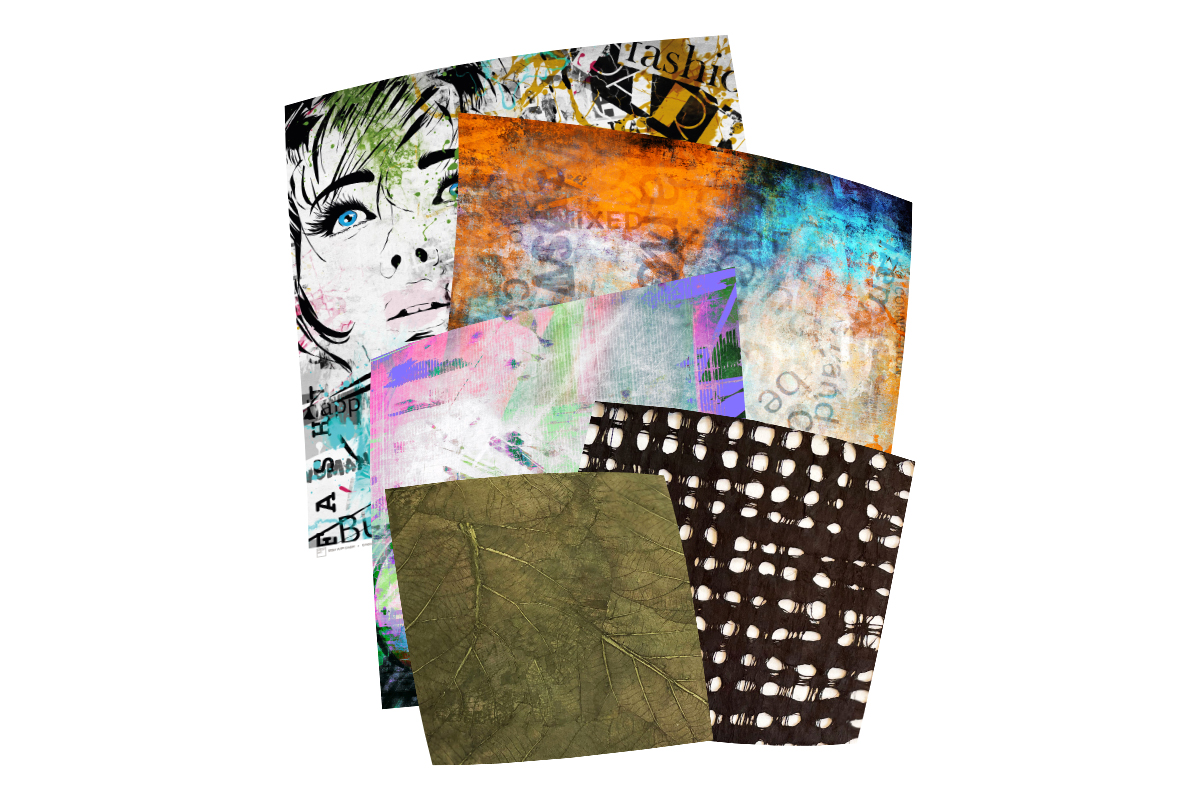
Resin adheres well to almost all substrates. Suitable surfaces are: Wood, canvas (from the size of approx. 30x30cm please stabilize from behind, see chapter "painting grounds"), glass, acrylic glass, aluminum and other metals. Suitable for overlaying are: Photos, prints, acrylic, oil paint (completely dried and treated with varnish), watercolor, spray paint, encaustic, ink, paper collages. Not suitable are: Wax paper and some plastics (including silicone).
Yes, you can, even if "resin and oil" sounds contradictory at first. Just remember that the surface in question must be completely dry. Also, after drying, treat the surface with an appropriate varnish before covering it with resin. If your painting can stand it, you can also work with a silicone remover. This removes the greasy film.
Yes, you can use resin on inkjet prints. However, there are many different types and brands of ink and paper - they all behave slightly differently. It is best to test on a small piece of paper. If you are unsure, you can either laminate the prints beforehand or seal them with e.g. a napkin glue (ModgePodge) before casting.
Yes, resin on paper works well. Resin can be used on all types of paper. So also on photo paper, tracing paper, linen paper, origami paper and synthetic paper. Resin will not be absorbed by paper like water if you use good quality paper. To be on the safe side, you can pre-treat the paper: This works great with transparent varnish and glue for napkin techniques - simply brush it onto the paper and it is sealed. Test it in advance on a small piece of your chosen paper.
Yes, if you pay attention to a few things in the process. Again, the synthetic resin seals what is being coated with it. A covered object is protected from air and retains its colours. There are some things you should know if you want to work with natural materials in your art: Things can look like they are wet when you coat them with resin. Do a test to see if this is the case with your item and if so, if you like it. Make sure your natural materials are thoroughly dry before you overcoat them. If they are not, they will rot under the resin layer. Choose items that are rather flat. They can be covered with resin more quickly. Depending on the height of the object, you may need to cast several layers of resin. The objects, e.g. dried flowers, must be completely dry.
Yes, resin and wood are wonderful to work with. It is important that the wood is absolutely dry. Resin then seals the surface and protects it from wind and weather. This is how you make sculptures and other objects weatherproof, even down to minus 15 °C. By the way, wood looks fantastic with a resin coating. Clear resin emphasises the colours and grains of the wood. Here, it is best to use our MASTERCAST for the clear coating or the Hi BUILD for the coloured coating.
Yes, it even looks really great. Apply the resin in thin layers with a paint brush or foam roller. Please allow the individual layers to harden each time.
Here are three good tips to prevent bubbles from forming.
- Make sure that the two components, resin and hardener, are at least 23-25 degrees before you measure them out to mix.
- Stir the mixture thoroughly but slowly. By stirring quickly, you introduce air into the mixture. Stirring slowly can cause bubbles to escape over the surface.
- Warm your substrate slightly before pouring.
Yes, it is possible for bubbles to form even after casting. How long depends on the resin used and the painting surface. It is best to observe the surface until it looks like it is gelling. Up to this point, you can still take corrective action with the hot air dryer or crème brûlée blow torch.
Yes, you can get rid of the blisters. And the best way is with heat. Use a hot air blower, a Bunsen burner or a crème brûlée burner. The heat warms the resin surface and bursts the bubbles. It is important that you go over the surface with a distance of 10-15 cm in slightly sweeping movements. If you apply the heat selectively to the surface, you will burn it.
Plastic cleaners and cleaning cloths for optical glass or photos are well suited. Please do not use glass cleaner or alcohol - the resin surface will become dull and matt over the years. Also not suitable: commercially available kitchen paper. It causes the finest micro-scratches on the surface.
Yes, you can actually do something to prevent the resin from getting dents. Here are three tips:
- make sure that the resin is cured at the right temperature. This means that the same temperature is maintained throughout the process, ideally 22 °C (or as specified on your product's datasheet). Resin may be sensitive, especially in the first 24 hours of curing.
- Foreign bodies such as dust particles or hair can also cause these dents. Your workspace should therefore be as dust-free as possible. In addition, you can protect your artwork by covering it, with a cardboard box for example.
- Use heat in moderation. If you work with heat (such as a hot air dryer), do not hold it on one spot, but move it over the resin surface at a distance of 10-15 cm. This prevents the resin from burning.
The technical term for this phenomenon is amine blushing. The reason for this is mostly due to a chemical side reaction. The humidity and the hardener interact with each other. Resins with a longer working time, e.g. ULTRACAST, are more susceptible to amine blushing and should be mixed according to these instructions.
- Warm the components container ULTRACAST slightly in a water bath or on the heater.
- Observe the exact mixing ratio.
- Mix slowly and thoroughly for 3 minutes, repot, mix again for 3 minutes. The resin must be clear and free of streaks. Small air bubbles are normal.
- Leave the mixing bowl to stand for at least 15 minutes.
- Warm the surface of the substrate slightly.
Make sure the room temperature is at least 22 degrees. The higher the room temperature the better. The perfect humidity is below 40 percent. Above a humidity of 55 percent, please do not pour final coats with ULTRACAST. There are inexpensive hygrometers for measuring the air humidity. To achieve this, it is also worth buying a dehumidifier.
It seems that you have poured too little resin. Resin is self-levelling and if you use too little of it, i.e. you have poured it too thin, then the resin cracks when it hardens. This has something to do with its surface tension, which is then disturbed. So if you discover something that looks like fish eyes, then you have simply used too little resin. It could also be that the surface of your artwork was not free of grease at every point before you cast with resin. Read the next point about this.
If resin behaves the way you describe, it's because of fat. The two do not like each other, they really repel each other. Even if you have degreased your painting surface, you may still have touched the edges with your bare hands. And that can be enough to transfer skin grease from your hand to the painting surface. So make sure that your painting surface is thoroughly degreased and this will not happen to you. Simply use spirit or alcohol diluted with water to degrease.
Do not worry. Resin is self-levelling. This means that it spreads evenly on a flat, smooth painting surface by itself. And it does this even up to a layer height of just under 1 cm. Feel free to help and
It's not a bad thing and yes, you can get rid of that greasy film. That's it: When resin cures at colder temperatures, it can happen that a greasy film is formed from the amines contained in the hardener. Even when using additives such as silicone or resi-BLAST, a greasy film can form and settle on the surface. This is how you get rid of it: Simply wash off the grease film. With water and a little washing-up liquid. The amines are water-soluble and can be removed easily. Better not to do it this way: Do not use sandpaper. It would be clogged in no time and the film would still not be gone.
There are several ways to spread resin. It is best to use a palette knife or a plastic spatula. It depends on what exactly you want to coat. A paint brush is very suitable for small areas. For large areas, you can use a foam roller. Or you can use your hands. They are well protected by nitrile gloves. If you follow a little trick, you won't make a mess: wear two pairs of gloves on top of each other. That way, your hands are still protected when you take off the top pair of gloves after spreading the resin.
Resin hardens faster with more heat. So increase the room temperature or use heat lamps. Important: The temperature must remain constant for the first 24 hours after covering. Otherwise you risk damage such as dents.
This is how you can make resin thinner and this is what happens: Heat the resin by placing the canisters with the two components resin and hardener on the heater or in a warm water bath. Heating changes the viscosity; it becomes lower, so the resin becomes thinner. You should know that the processing time is shortened by heating.
Pour as many layers on top of each other as you want or need. There are only two things to keep in mind: 1. follow the manufacturer's instructions for the height of a layer. 2. if you always use the same resin, wait until the previous layer is dust-dry before applying the next one.
Yes, you can drill into resin if you pay attention to a few things: - Only drill when the resin has cured. - Be sure to wear a respirator to protect yourself from inhaling the drilled resin particles. - Start with a small drill and drill a small hole. Then switch to the next larger drill bit and work your way up, size by size, until the hole is as large as you would like it to be. - Drill carefully so that you do not splinter the resin. - Do not drill near edges.
It is a bit of a challenge to photograph resin images. Because the high gloss that characterises resin is very reflective. But it is possible. And this is the best way: - Use daylight without direct sunlight. - Hang a large white cloth opposite the picture. This can be a tablecloth, a linen cloth, a bed sheet or similar. This will prevent things from "opposite" being reflected in the picture. - Then test which position in front of the picture is the best and from which angle you take the picture. If you try a little, you will definitely get a good photo.
1. the first thing you should consider before wrapping is the following: Let your painting cure completely. This usually takes 5-7 days. This is the only way to ensure that there is no damage to the surface. The second important aspect is the packing material. First place a layer of so-called glassine paper (or baking paper) on the resin surface. Then wrap your artwork in foam film; it protects and cushions shocks. Bubble wrap and resin, on the other hand, do not mix very well. If this film remains on your picture for a longer period of time, the nubs will leave marks. You can still wrap your picture in bubble wrap: First cover it with glassine paper. For additional security, wrap the film around the picture with the smooth side, keeping the studs on the outside.
In the first few hours after completion, look at your artwork from time to time and carefully remove foreign bodies with tweezers. This can also be done at a later stage - if you then go over the surface again with the hot air dryer from a greater distance and thus smooth it out again.
You can calculate the quantity for a round surface just as easily as for a square one. I have also developed a formula for you for this purpose. It is: Radius in cm x Radius in cm x 3.14 (Pi) x 0.158 (Layer thickness) = Amount of resin in milliliters First I will explain the individual terms and then I will show everything with an example. Radius in cm: The radius is half the diameter of a circle (or sphere), i.e. the diameter divided by the factor 2. This is the only number you have to contribute yourself by measuring and calculating. 3.14 (Pi): Pi or circle number. This number is simply added to the calculation. 0.158: This is the average height (thickness) of a layer of resin in cm. This number is simply inserted into the calculation. Example: If your surface has a diameter of 70 cm, then calculate: 70:2=35 cm. So the radius in this case is 35 cm. Since the other numbers are fixed, you only need to insert the number 35 into the formula; it will then be: 35 x 35 x 3.14 x 0.158 = 608 ml (rounded) You will need 608 ml of resin for your surface with a diameter of 70 cm. Written out, the formula for the example looks like this: 35 (radius in cm) x 35 (radius in cm) x 3.14 (pi) x 0.158 (layer thickness in cm) = 608 (amount in ml)
Since epoxy resins consist of two components ("resin" and "hardener"), it can be cleaned with 2 different products. The resin component (not mixed), can be removed e.g. with solvents such as isopropanol or acetone. Please do not apply to the skin, because the "dilution" of the resin itself makes it penetrate even deeper. In addition, the alcohol dries out the skin extremely and can cause nerve damage if used frequently. The hardener component can be cleaned with simple household vinegar. In fact, the hardener is alkaline. If we treat it with an acidic substance like vinegar, the hardener can be removed relatively easily.
My tip: Buy Marseille soap (choose a highly concentrated olive oil soap, it is highly refatting) and use hand disinfectant gel instead of water. This will clean your hands gently. Alternatively, baby wipes are suitable. You can also clean your hands with alcohol. However, this dries out the skin very much and is not recommended for frequent use, as the resin penetrates even deeper into the skin due to the alcohol.
Hardened resin can no longer be removed from clothing. Immediately soak fresh resin in water and then remove with soap and vinegar. It is best to put on old clothing right away.
Cured resin:Resin is an epoxy resin and therefore a plastic. This already tells you where you can properly dispose of possible residues: in the yellow bin or in the yellow bag. Liquid components:The situation is different for the individual components resin and hardener: If you have liquid residues in your containers, they are considered hazardous waste and must be disposed of accordingly. This ensures that liquid resin and hardener do not get into the groundwater. Empty containers can be placed in the plastic waste. Liquid resin residues:Mix small residues of resin and hardener that are no longer needed and then allow this mixed resin to harden. It can then be disposed of in the yellow bin. You can also get resin or hardener individually from us. Please contact us for more information.
The slight difference in the bottle fillings is completely normal. There is a difference in viscosity and density between the resin and hardener components because one is heavier than the other (higher specific gravity). Since we fill the bottles by weight, this results in different volumes and therefore a slight difference in level in the bottles. Rest assured that you will always receive the correct total weight as ordered.